Thursday, July 14, 2011

The Food Scene at Rockaway Beach

All images © Valery Rizzo

So some of you may know already I shoot a photo feature each month for a popular Brooklyn website, Nona Brooklyn, well this month's story is now live and is about the new food scene out at...YES...Rockaway Beach. Although Rockaway Beach is technically Queens, most of the food concessions are from Brooklyn! which means these are no ordinary boardwalk eats but instead really interesting, healthy and hip selections to have at a beautiful beach with surfers, skateboarders, bike rentals, handball and a national park. To see the full feature and check out the food scene please visit Nona Brooklyn and then spend a day at the beach.


Thursday, June 30, 2011

Sunset Park Shrimp Boil

All images © Valery Rizzo

Laura and Brian live in a one bedroom, railroad apartment, in Sunset Park, Brooklyn. The best thing about the three story, building they live in is the fabulous large communal backyard which all the tenants share. Besides being a singer, songwriter and keyboard player for the indie-pop band Sunset Victim, also of which Brian plays guitar and my husband the drums, Laura is an amazing garden designer and foodie extraordinaire. Originally from Georgia, she has been lucky enough to find many of her friends from her home state also living in Brooklyn so every year her and Brian throw a huge southern style shrimp boil in their yard.

Laura has a friend, also named Laura, also from Georgia, who comes over before hand to help prepare all the food and a very, very large vat of Bloody Mary cocktail. Guests are encouraged to make or bring a dish, or drinks of their own and then Laura cooks up a smorgasbord of amazing food, to accompany the star attraction, the shrimp boil. The spread included deviled eggs, five spiced pecans, pickled wild ramps (which are also wild leeks and picked on the back end of Brian’s parents property in Connecticut), a fennel salad with baby red oak and baby chard with an Agave, Dijon vinaigrette (made and brought by Laura’s friend Liz), New York cheddar cheese grits made with a local dried salemme pepper, a Crudité of radishes, asparagus, celery and sugar snap peas with a blue cheese shallot dip, baked bacon rapped dates (made and brought by her friend Sasha), The shrimp boil which consisted of three different types of jumbo shrimp, wild Beaumont (Texas shrimp), New Caledonia Pacific water wild blue shrimp and a South American shrimp, Andoullie, Andouillette sausage and kielbasa from der Kommissar in Brooklyn, whole heads of organic garlic and cobs of corn, locally grown organic yellow onions and Yukon gold potatoes.

For dessert there was a rhubarb upside-down cake, which Laura adapted from a Martha Stewart recipe. Instead she uses a fairly local Beurremont butter, sour cream from Hudson Valley, organic cane sugar and farm eggs from Eli Hershberger, which she says are bigger and have a marigold colored yolk that just makes all your cakes brighter and more golden. All of these ingredients she finds at the Park Slope Food Coop.


It was a beautiful afternoon of friends and family, laughing, eating, drinking and cooking all with the anticipation of the moment when the boil is done and the interior basket gets hoisted out of the boiling water and dumped into a garden wheel barrel filled with newspapers and then all at once the hungry guests attack.

The recipes below were all written by the very talented Laura Comerford, with the except of the Upside-down Rhubarb cake which I actually made for this post because the cake Laura made at the shrimp boil was gone before I even made my way over to the table. I made it as per Laura's instructions which was made verbatim from a Martha Stewart Living recipe and changed slightly to include more orange zest and organic and local ingredients.


These’ll make a Southerner out of any Yankee!

serving size:  6 generous helpings
prep & cooking time:  40 minutes
bake time:  20-30 minutes
 1 1/2 cups local &/or organic whole milk
1/2 cup local &/or organic cream
2 cups water
1 1/2 tablespoons sweet cream local butter
1 cup stone-ground grits*, NOT INSTANT
1 clove garlic, finely minced
1 bay leaf, or a 4-5 leaf twig of wild bayberry leaves**
3/4 teaspoon kosher salt (You can always add more to your liking)
1/8 teaspoon fresh ground black pepper
dash of cayenne or red pepper flake, (I like Connecticut cultivated Salemme pepper, www.salemmepepper.com)
1 teaspoon fresh thyme or oregano, finely minced
1 cup local sharp cheddar or cheddar-type cheese, plus more for grating on top (For New Yorkers, Cato Corners' Bloomsday is super tasty too and the sharper the better, to work with the creaminess)
1 large egg, or 2 small eggs
1/4 cup diced wild onion tops or scallion (optional)
sprinkling of homemade bacon bits (optional)


1. Preheat oven to 350 degrees F. If you don't have a Dutch oven, butter an oven-proof crock and set aside. Otherwise, in a Dutch oven or a large sauce pan, add milk, cream, water, salt and grits.  Cover. On medium-high heat, bring to a gentle boil. Uncover, reduce heat to low, add bay leaf or bayberry leaves and garlic.  Cover and simmer, stirring frequently for about 30 minutes. Feel free to add more milk or water when necessary.  

2. While simmering, grate a cup of your local cheddar-type cheese. After grits have absorbed the liquid, are tender and have a firm and creamy consistency, stir in 1 cup of the grated cheddar. Remove from heat, add thyme and peppers and allow to slightly cool.

3. In small bowl, beat the egg. Gradually add 3/4 cup of grits mixture to beaten egg, blending as you go. It's important that the grits have cooled slightly so that the egg doesn't cook on contact of the warm grits. Add egg and grit mixture to grits and blend thoroughly. The addition of the egg is actually optional, but it lends a fluffy, souffle-like finish to these dreamy grits. If not using Dutch oven, transfer to buttered crock, sprinkle with 1/4 cup grated cheddar (or parmigiana reggiano if you'd like a contrast in flavors) and bake for 20-30 minutes, or until cheese is golden or crisp. Sprinkle with coarsely cut fried bacon and scallions.   

*I'm lucky to have a source. When I go home to Georgia, I always leave with "the goods". My sister Lisa gave me a delicious bag of grits from the Logan Turnpike Mill in Blairsville, Georgia, where by the way, the country's largest sorghum festival is held in October! 

**When serving, be careful of the bay and bayberry leaves. They can sometimes have sharp edges and are not meant to be ingested whole. In Russian tradition, it's good luck if you get the bay leaf in your borscht and I apply the same fortune to wild bayberry leaves in my grits.


The ramp and dandelion have the same early spring season. As a result, they make an excellent culinary pairing. When using the buds, the dandelions lend a slightly floral honeyed contrast to the pungent, earthy ramp.

1 cup raw sugar
1 cup apple cider vinegar
1 cup water
1 teaspoon kosher salt

The above brine will yield approximately 4-5 jars of pickled ramps. Double the recipe if you have more ramps. Bring the above to a boil and have ready the following:
Clean well & trim roughly 3 lbs of wild ramps. Make sure your source is safe and reliable. When cleaning, trim right above the root & cut right below the leaves where the plant turns white. Don't discard the greens: roast, saute, use in quiche, make eggs Florentine...too many things to do with these to throw them on the compost heap. 

As many dandelion buds as you can find. They’re elusive buggers! Again, make sure your source is reliable; that no pesticides or herbicides have been used. 
And any or all of the following combined to make a heaping tablespoon:
Fresh rosemary
Fresh thyme

Celery seed or wild celery seed

Bay leaf or wild bayberry leaf

Whole chili pepper, dried or fresh (I use 3 small, dry Thai chilis per jar)

Peppercorns

Coriander seed

Dill seed

Stuff all the above in a super-clean mason jar that will just accommodate all of the 
ingredients, including the brine. Pour hot brine over ingredients in the jar. You can cool
 down to room temperature in an ice bath, or you can simply cool down, undisturbed, on 
a countertop. It may behoove you to cover the mouth with cheesecloth, as little fruit flies 
just love the smell of these pickles. Store, covered tightly, in the refrigerator. Keeps 
for up to 3 months. You can do a gazillion things with these: serve with grilled cheese 
sandwiches, burgers, dice in deviled eggs, serve in a bloody Mary…or eat out of the jar!


This recipe is straight from Bon Appetit march 2001. Great, easy recipe that can be made in advance, i.e., two days or the night before, making it a great time-saving additon to the boil spread.

Makes 2 cups

1 tablespoon vegetable oil
1 1/4 cups thinly sliced shallots (about 4 ounces)
3/4 cup mayonnaise
3/4 cup sour cream
4 ounces blue cheese, room temperature

Heat oil in heavy medium saucepan over medium-low heat. Add shallots. Cover and cook until shallots are deep golden brown, stirring occasionally, about 20 minutes. Cool.
Whisk together mayonnaise and sour cream in medium bowl to blend. Add blue cheese. Using rubber spatula, mash mixture until smooth. Stir in caramelized shallots. Season dip to taste with salt and pepper. Cover dip and refrigerate until flavors blend, about 2 hours. (Can be made 2 days ahead. Keep refrigerated.) Serve dip chilled or at room temperature.


Yankee-tonk Low Country Boil, or, When a displaced Southern Girl wants a taste of the Summer South, with help from the fabulous Lee Bros. Southern Cookbook. This recipe can be tailored to the number of folks you're feeding.

Equipment
Outdoor tripod gas cooker (with propane)
10 gallon stock pot with lid
Many oven mitts
Long-handled wooden spoon
1 or 2 long-handled sieves or wooden spoons (for scooping out contents)
Wheelbarrow or large trough, (if you don't have these, you can use an old table)
Newspaper or craft paper
The great outdoors, or a backyard

Ingredients
6 gallons water, roughly, (you want to fill your stock pot about two thirds full with water)
1 cup Old Bay Seasoning
1 cup kosher salt
1/2-1 cup whole dried chili peppers (habaneros, scotch bonnets, serranos etc...) gauge how hot you can stand it...
6-8 tablespoons ground cayenne
3 tablespoons celery seed
2-3 tablespoons black peppercorn, crushed if desired
2 heaping tablespoons coriander seed
15 bay leaves, scissor cut into the water
2-3 cups whole plum tomatoes, (or if you have a bumper crop of tomatoes, quarter them and call it a day)
8 lemons, quartered
8-10 lbs. medium yellow waxy potatoes, quartered
12 large yellow onions, cut into wedges
1 large bunch of celery, leaves and all, very coarsely chopped
5 pounds andouille or kielbasa sausage, cut on the bias into 1 1/2 inch pieces
18 ears fresh corn, shucked and halved crosswise
8 pounds headless shrimp (26-30 count), shells on
100 top-neck or hard-shell local clams, cleaned

Directions
Combine water, salt, spices and tomatoes in stockpot. Using the lid will speed initial boiling time. Over high heat, bring a to boil. Remove lid. Taste and adjust the flavor accordingly. In this order, add potatoes, onions and celery, cook about 7 minutes, or until slightly softened, but not tender. Give a stir to distribute the vegetables. Add sausage and clams, cook for about 10 minutes. Keep checking for the clams to open. As soon as you notice them opening, add corn and cook for about 3 minutes. Check your potatoes now too, they should almost be fork-tender. Finally add shrimp and cook until it just turns pink, about 3 minutes.

Have ready and close, a newspaper or craft paper-lined wheelbarrow. If you don't have these, use an old table that you don't mind pouring hot, wet contents onto. As efficiently as possible, scoop out contents with long handled sieves or spoons, into wheelbarrow. You may want friends to help with this. Grab a plate and start pickin'. Hands required! 


Again this recipe is a Martha Stewart Living recipe and just changed slightly to include local and organic ingredients. The cake has a crumb topping that actually ends up on the bottom. Each bite has a surprisingly crunchy texture.


Makes one 9 inch cake
Serves 10

For the topping
4 tablespoons unsalted butter, melted (I used fairly local Beurremont butter)
1/2 cup unbleached all-purpose flour
1/4 cup organic cane sugar
coarse salt

For the cake
1 1/2 sticks unsalted butter, room temperature, plus more for buttering pan
1 pound rhubarb, trimmed and cut on a very sharp diagonal about ½ inch thick
1 3/4 cups sugar
1 1/2 cups all-purpose flour
1 1/2 teaspoon baking powder
coarse salt
1 teaspoon finely grated orange zest, plus 1 tablespoon fresh orange juice
2 large organic or farm fresh eggs
1 cup organic sour cream

Directions
Preheat oven to 350°. Make the topping: stir together butter, flour, sugar, and 1/4 teaspoon salt until moist and crumbly.

Make the cake: butter a 9 inch round cake pan (most importantly 2 inches deep). Dot with 4 tablespoons butter (cut into pieces). Toss rhubarb with three-quarter cup sugar; let stand for 2 min. Toss again, and spread in pan.

Whisk together flour, baking powder, and 1 1/2 teaspoons salt. Beat remaining stick butter and cup sugar with a mixer on medium speed until pale and fluffy. Beat in zest and juice. Beat in eggs, one at a time, until incorporated, scraping down sides of bowl. Beat in flour mixture in 3 additions, alternating with sour cream, until smooth. Spread evenly over rhubarb. Crumble topping evenly over batter.


Bake until a toothpick inserted into the center comes out clean and top springs back when touched, about 1 hour. Let cool for 10 min. Run a knife around edge of cake, and invert onto a wire rack. Let cool completely.


Deviled egg recipe soon to come

Saturday, June 25, 2011

Brooklyn Photo of The Week : Tenth Acre Farms

Tenth Acre Farms, Greenpoint, Brooklyn, 2011. 
Photo © Valery Rizzo

While I'm still preparing the recipes for my Sunset Park Shrimp Boil story to post here on Eating Brooklyn, I figured I would share a photo which I managed to get for my Brooklyn book project while I was shooting one of my next photo features for Nona Brooklyn, about Tenth Acre Farms, coming soon...with lots of lush photos and produce.


Tuesday, June 21, 2011

Polaroid + Food

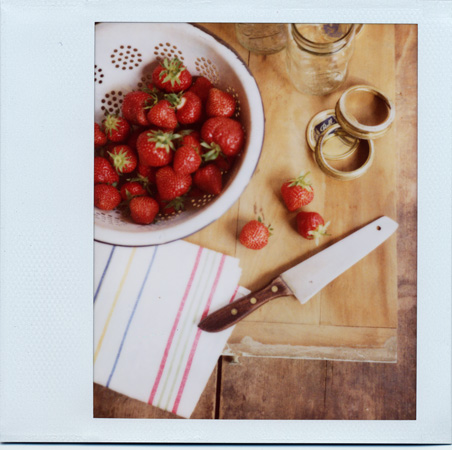
Finds at the Food Coop, locally grown within 500 miles, fresh organic strawberry basket

Recently I was thinking about how my love of food photography really started with Polaroid. One Thanksgiving while I was making cranberry sauce using organic whole cranberries with orange zest I decided to photograph the process and I fell in love, with food + instant film. This week at the Park Slope Food Coop I found beautiful baskets of organic strawberries as well as amazing broccoli that was being sold with all its large dark green leaves still attached. I grabbed a couple bunches and noticed all the loose leaves laying around so I started collecting some of those as well for my bird, Lola. At the same time this woman who was standing next to me was staring at me like I was crazy and she started plucking off all the leaves attached her bunch. When I asked her if I could have her leaves that she was discarding, she looked at my three heads and asked what I would use them for and I explained they were for my parakeet, who also eats kale and spinach by the way. She was not very amused. I also ate some of the leaves myself sliced thinly in a salad as well as steamed with the broccoli Florettes, and they were hearty and delicious.

Well…my idea really was to create a post for Eating Brooklyn which would include both finds at the Food Coop together, all shot with Polaroid, since I was pleased with the strawberries I had already shot. I only had four shots of Polaroid Spectra film left in my Minolta instant Pro. I really should have paced my shots because in the end after I had beautifully styled my bunches of broccoli I was left without a winning shot. Always, always have extra film! Which these days, sadly it’s much too difficult to keep up with because of the price of instant film, since polaroid decided to stop producing it. Thanks Polaroid!


 Making cranberry sauce with orange zest, SX-70 with 600 film

Yes I know, there are all those fun apps on the iPhone that produce Polaroid like photographs, which are beautiful by the way, but I still don’t have an iPhone and to me it’s still not the same as using film. Believe me I would love to have an iPhone and be able to use all those fun apps that mimic all the old-school types of films but I simply cannot afford one...hint, hint, Apple, wouldn’t you like to give me an iPhone? : )  I also have stock photography to keep in mind and the fact that with film you can provide your client a high resolution file for print. Then again the Polaroid like images you get from your iPhone apps may be good enough for publication on the web, with the added advantage of being tremendously cheaper to produce! 

Still I managed to have the some of the following Polaroids included in the Foodpix collection (as well as other non food related polaroid shots) at Getty Images and I am very honored to be included as one of the photographers in an upcoming book about food photography and styling, by well-known food photographer and writer Lara Ferroni, who will be featuring some of my Polaroid work in the book. Thanks Lara!


Polaroid + Food is one of my favorite Flickr groups, administered by wonderful photographer, editor and writer Steph Parke who also has a great recipe blog, budding foodie, where she features a lot of her own Polaroid food photography. There is also the Impossible Project, which is saving the art of instant film since Polaroid dropped the ball, but although they have come out with some great and innovative film I am still waiting in my opinion for them to perfect their color film because it does not quite have the sharpness and the vivid color I had come to love about Polaroid film. I do love their black frame film and I did manage to get a shot of a mint bunch which I quite like from their black-and-white film. But still most of my more successful shots were shot on the original Polaroid film. An image from one of my stock shoots of a young girl holding a gingerbread house was featured in the impossible Project holiday newsletter. 


Although I am disappointed by Polaroid as a company for discontinuing their instant film I am curious about their new product, the GL30 digital camera coming out later this year. It’s supposed to combine the best of both worlds, the feel and look of using a vintage Polaroid camera together with a more modern look and digital results, don’t disappoint me Lady Gaga!


Thursday, June 16, 2011

Brooklyn's Many Greenmarkets

Photo © Valery Rizzo

This past month I have been photographing the farmers and their stands at some of Brooklyn's many thriving greenmarkets for my recent photo feature for Nona Brooklyn. I enjoyed meeting and talking with all the farmers and vendors and learning about all that these markets have to offer from local farms throughout New York State, New Jersey and Long Island. What a beautiful way to spend your summer weekend mornings.

To see the full feature visit Nona Brooklyn...


Thursday, June 9, 2011

Brooklyn Photo of The Week

Photo © Valery Rizzo

Rhubarb being sold by Red Jacket Orchard from Ontario, New York, at The Greenpoint / McCarren Park Greenmarket in Brooklyn. 

Union Ave btwn Driggs & N 12th Street, Open Saturdays, year-round, 8:00 a.m. - 3:00 p.m. This much-loved Saturday market, bridges the burgeoning Williamsburg hipster and long-time Greenpoint Polish communities, who come to shop, mingle with neighbors, and enjoy the park setting along with picnickers, dog-walkers and joggers.


Monday, May 30, 2011

Laurie's Homemade Toasted Granola

All images © Valery Rizzo

Today I spent the day with Laurie Pierre, a vegetarian, singer, songwriter and community manager for a social media communications agency, who lives in Sunset Park, Brooklyn. She is soon to be married next month, to her fiancé Todd beneath the Brooklyn Bridge and the food at the wedding will be from all the local places they love in Brooklyn. I had heard so much about Laurie’s fabulous homemade granola and she was nice enough to share her recipe with me so I could then share it with all of you. 

One day while at a birthday party Laurie overheard a woman talking about granola and was immediately inspired to make her own. The first thing I love about her recipe is that the oats, nuts and seeds used to make the granola are toasted on the stovetop instead of being baked. This gives it a natural and healthy flavor instead of the harder version made with more sugar, which is usually baked in the oven. The second thing that I think makes her recipe, is her plentiful use of cinnamon and nutmeg spices. The end result is a mixture of oats, two kinds of nuts (here she used almonds and walnuts), pumpkin seeds, sunflower seeds, dried cranberries, dried apricots, spices, maple syrup and canola oil. We paired the granola with some organic hemp milk topped with some fresh blueberries. It was very nutty, crunchy and sweet, but not too sweet and the fruit and spices add a nice tropical taste to it, perfect for summer.


3 cups oats

1 cup sunflower seeds

½ cup pumpkin seeds

½ cup almonds

½ cup walnuts

½ cup dried apricots

½ cup dried cranberries or raisins

 1 tablespoon nutmeg

1 tablespoon cinnamon

½ cup organic maple syrup

2 tablespoons canola oil (which acts as a preservative)

Using a medium bowl mix your oats with your sunflower seeds. Quarter the apricots into pieces. Put your nuts into a bag, you can even use the plastic or biodegradable fabric eco bag you purchased them in and using the flat side of a meat tenderizer or a large spoon break the nuts into large rustic pieces.


Now we want to toast all of our oats, nuts and seeds on the stovetop, using one medium-sized stainless steel pan to toast the oat and sunflower mixture and two small to medium nonstick pans, one for the pumpkin seeds and one for the nuts.  Pour just enough of each in the pans so as to coat the bottom and so that they toast evenly. Cook ingredients in batches over medium heat turning continuously so it does not burn and until everything is golden brown and toasted. After each batch has been toasted place into a large bowl and sprinkle with ¼ tablespoon of cinnamon and ¼ tablespoon of nutmeg while it is still warm and toss together. Repeat this same step after each batch is toasted and placed into the bowl. When you have finished you should have all of your oats and sunflower seed mixture, pumpkin seeds, and nuts all toasted and in the large bowl together.  Sprinkle any remainder of your cinnamon and nutmeg on top of the mixture while still warm and toss. Then add your dried cranberries, apricots pieces, maple syrup and canola oil then mix well together.

Spread mixture onto a large baking sheet and let cool for about 30 minutes to 1 hour before storing or eating. Can be enjoyed with some organic hemp, soy, rice milk or any milk of your choice and topped with fresh berries. You can even add the granola to your favorite plain yogurt. Kept in an airtight container it will last up to two weeks.

Makes about 6 to 12 servings

All ingredients were purchased at the Park Slope Food Coop.


Saturday, May 21, 2011

Food Vendors at The Brooklyn Flea

Photograph © Valery Rizzo

This month I shot another photo story for Nona Brooklyn, this time about the food vendors at The Brooklyn Flea. Nona Brooklyn is a resource for Brooklynites looking to discover local, artisanal, and sustainably-produced food in Brooklyn. To see the full feature on Nona Brooklyn click here

If your not familiar with the flea it's one of Brooklyn's best markets happening every weekend of the year, featuring hundreds of top vendors of antique and repurposed furniture, vintage clothing, collectibles and antiques, as well as a tightly curated selection of jewelry, art, and crafts by local artisans and designers, plus delicious fresh food. Right now the Flea is open every weekend on Saturdays in Fort Greene and on Sundays in Williamsburg, from 10am to 5pm, rain or shine. Both markets feature a similar mix of 125+ vendors on an acre lot: click here for a map and directions to the locations.


Thursday, May 19, 2011

Finds at The Food Coop


All images © Valery Rizzo

So I have been pretty crazy over the baby greens at the food coop lately. Baby kale, baby beet greens, baby swiss chard, baby bok choy, baby arugula, baby mustard greens and so many other green babies. People stand over them surprisingly questioning what to do with them and I just say simply make a salad! 

This week what struck me in particular was the watercress, the bunches of radishes and I always have to buy some baby kale every time I see it there, you could say I am in love with it. I created a salad made with green leaf lettuce, watercress, baby kale, cherry tomatoes and slices of radish topped with hemp seed, which gives it a nutty flavor and crunch, a bit of balsamic vinegar, extra-virgin olive oil, cracked black pepper and salt. This together with some sprouted bread is a perfect lunch.

I always lovingly think of my Latina mother-in-law when I make a salad now and how one day she said to me "Valery, you are for salads!" repeating that over and over again as she devoured the healthy salad I had made her for lunch while going back for seconds. 


Friday, May 13, 2011

Whole Wheat Calzones with Fire Roasted Peppers, Spinach, Onions, Olives and Two Cheeses


All images © Valery Rizzo


Last summer on our last night in Italy my family took us to a restaurant for pizza. Instead of ordering individual pies a few of my cousins ordered calzones. I remember thinking how odd, a calzone for dinner? But I quickly had feelings of regret when their calzones arrived and I instead had ordered a boring pizza. We won’t even get into the pie that one of my nieces ordered which was served covered in French fries. The calzones were not anything like the greasy, goopy, doughy things you get here. Instead they were these very long beautiful bread filled creations loaded with steaming fresh vegetables and cheese.

When I returned I decided to make my own even healthier version using whole wheat and unbleached flour. The peppers I roasted myself the way my uncle Amerigo taught me but you can also buy peppers already prepared and the same goes for the pizza dough that is if you can find whole wheat dough. I enjoyed the baked calzone with a beautiful bottle of Tanzen Dame a natural dry white table wine from Bloomer Creek in the Finger Lakes, which I found at The Natural Wine Company in Williamsburg Brooklyn where they feature organic and biodynamic natural wines.


4 organic orange and red peppers

4 brown lunch paper bags

 extra-virgin olive oil

 cracked black pepper

 salt


You can roast your peppers directly on your stovetop. Place each pepper separately on it’s own burner with the fire on high. The idea is to burn the skin of each pepper until it is black.  With a pair of tongs or a large kitchen fork continually rotate each pepper until all sides are burnt and black.

Then take each pepper and place in its own separate brown paper bag and let cool for about 10 to 15 min. Preparing one at a time shake the pepper while inside the bag, allowing for the skin to loosen from the flesh. Tear each bag and use as a base to peel the black skin off the pepper. First remove the top stem area including all of the seeds and in sink under cold running water rinse the remaining black areas of the pepper until clean. Tear lengthwise into 2 to 3 inch strips and place on a plate. Do the same for other three peppers. Dressed with a bit of olive oil, cracked pepper and salt. Set aside. You can also prepare this the night before.


1 package dry active yeast

1 ¼ cup lukewarm water

1 ½ cups organic whole wheat bread flour

2 cups unbleached all-purpose flour

1 tablespoon extra-virgin olive oil

1 tablespoon Turbinado sugar

½  teaspoon of salt

1 cup semolina flour for dusting (you can use all-purpose flour as well)


Proof the yeast. You do this to make sure the yeast is still alive and active. Dissolve or mix sugar in water then add yeast, allow to sit in until yeast foams slightly, about 5 min.
In a separate bowl combine Whole-wheat bread flour and unbleached all-purpose flour. Mix together.

Using an electric mixer take 3 cups of the flour mixture and add the salt.  Adding the olive oil and proofed yeast pulse together. Start adding remaining ½ flour mixture until the dough is not sticky anymore and forms a ball on the hook attachment of the mixer. Removed, form into a ball and put into a bowl that has been coated with olive oil. Cover with a kitchen cloth and let rise in a warm place for 45 min. to 1 hour or until the dough has doubled in size.

Transfer to a board you have dusted with semolina flour and start to knead a bit. Roll into a ball then wrap the dough with Saran wrap and place in refrigerator for at least two hours or overnight if you wish to prepared dough the night before.  Bring dough to room temperature before using.